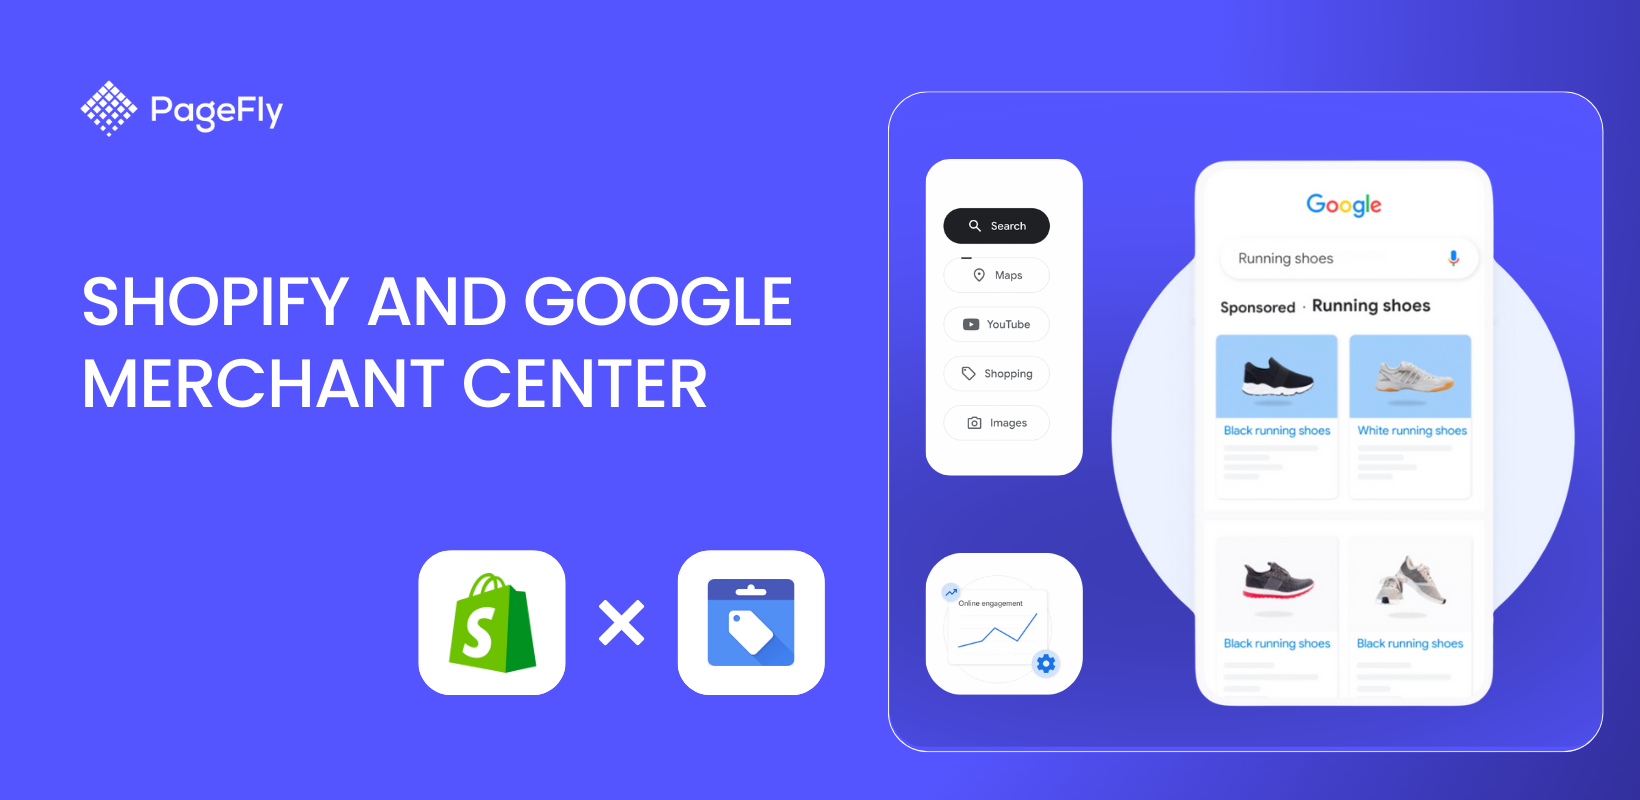
Shopify and Google Merchant Center can allow merchants to post free listings on the Google platform. This results in free online reach and traffic to your store—no ad spend or credit card information needed.
As a leading Shopify partner, PageFly is no stranger to leveraging tools for increasing eCommerce conversions. That includes maximizing free, accessible tools, such as Google and Shopify, to vastly improve Shopify store reach and traffic.
Our guide will tackle the Google Merchant Center, what it can do for your store, and how to set up a Google integration to your Shopify account.
What is Google Merchant?

Google Merchant differs from Google Ads. With the latter, you pay Google ad spend for a sponsored spot on the SERP.
Google Merchant, on the other hand, shows your Shopify store’s products completely free to users who search for relevant keywords, use Google shopping, and even those who go on YouTube.
Also, unlike Google Ads, these free listings are exclusively for products.
What can Google and Shopify do for your store?

As mentioned, understanding how does Shopify works with Google (i.e., Google Merchant Center and a Shopify account) allows merchants to place their product listings free of charge on Google. This is the Merchant Center’s main benefit.
This can be attributed to Google making its search engine more intuitive. So, when users perform a transactional search, they’ll immediately be shown product listings related to their search.
Searchers won’t have to open dozens of product pages. Instead, they’ll see all the styles and colors to choose from at a glance—as if the Google SERP had become a dedicated listings page.
So if you wish to appear for these transactional searches, sync your Shopify online store with Google Merchant.
How to Connect Shopify and Google Merchant Center
Acquiring free listings first requires connecting Shopify to the Google Merchant Center.
We’ve compacted the entire syncing process into three easy steps:
Step #1: Get Started with the Google Merchant Center

First, go to the Google Merchant Center home page and sign up for an account. To do that,
- Go to the Merchant Center page and click Start Now.
- Fill out the details that show.
- Click on Connect to Shopify.
Clicking this will prompt you to install the Google & YouTube Shopify app.
Step #2: Install the Google & YouTube Shopify App

The Google & YouTube Shopify app is required to sync details between the Shopify store and the Merchant center.
- Once prompted, click Install.
- Click Connect Google Account.
- Sign in to the Google Account associated with the Merchant Center.
- Fill in the requested information.
- Click Continue to Merchant Center.
At this point, your Shopify account should now be connected to the Google Merchant Center. But you still need to sync your shipping information and products.
Note that this connection step-by-step may look different for various Google users. But whatever screens or prompts Google displays, they should be intuitive enough for you to follow.
Step #3 Connect Shopify to Google
Once your Shopify and Merchant Center are connected, the Google & YouTube Shopify app will guide you through some steps to fully sync your store details with the Merchant Center.

It includes five simple steps:
- #1 Implement the requested prerequisites in your Shopify store. You’ll need to fulfill the following prerequisites in your Shopify online store:
- Add a valid payment method. Customers need a way to pay for the product. Go to Settings - Payments to set that up.
- Create an online store. Your online store should be live, not password-protected.
- Add a refund policy and terms of service. Go to Settings - Policies and add a 1) Return and refund policy and a 2) Terms of service policy.
- Add contact information to your store. You may add your store’s contact info anywhere on the store. The Google & YouTube app indicates that this could be “a contact form, a link to your store's social media page, an email address, or a phone number.”
- #2 Connect a Google Merchant Center Account. In this section, select the Google Merchant Center account you’d want to connect to from the dropdown, then click Connect.
- #3 Verify the Business Phone Number. Input your business’ mobile number in this section then click Get code. You’ll be asked to verify the mobile number.
- #4 Manage the Product Feed Settings. For this step, you’ll need to manage Product sync settings, Target country and language, and Shipping settings. You may choose to sync that first and third one automatically from Shopify or manually set it up. Note that the requirements for this step may look different for other people.

- #5 Accept the Terms and Conditions. Tick on ‘I have read and agree to the terms’.
Once you’ve completed these five steps, finalize by clicking Complete setup.
You may manually edit these settings and details later from the Shopify Merchant Center if you need to change something or if you feel you’ve input the wrong information.
How to Display Free Listings on Google and YouTube
Listing your products for free on Google and YouTube follows a quick and easy three-step process:
Step #1: Check Product Eligibility

Source: Google Merchant Center
Your products must first abide by Google’s free listing policies before you can secure free listings. This means your Shopify product listings shouldn’t be dangerous, inappropriate, adult-oriented, misrepresentative of the actual product, or counterfeit.
But an easy way to learn if a product is eligible for Google is that when you add them to the Google Merchant Center, they have the “Approved” status.
“Approved” products can appear on product feeds and may be integrated into a paid ad campaign.
Step #2: Add Shopify Products to the Google Merchant Center
Shopify Products are added to the Google Merchant Center either automatically or manually.
If you’ve followed this guide up to this point, chances are that your Shopify products can be found in the Products section of the Google Merchant Center.

But if not,
- Click Add Products.
- Choose a method.
- Select Connect to Shopify if you wish to add them automatically.
- You may select the other methods if you prefer a different method or, if for some reason, the Shopify approach doesn’t work.
- Selecting Add Products One By One should allow you to provide the most comprehensive list of details and information for the products you’ll add. For one, if you’re adding an apparel item, this approach lets you input size, gender, material, pattern, and age group.
- If you’ve selected Connect to Shopify, go to the Google & YouTube Shopify app and underneath Product Status, click on Bulk EditProducts.

Source: Daniel Budai
- Fill in the fields that have “Google:” on them when applicable. These include “Google: Color”, “Google: Size”, and “Google: Gender”.
- Wait for the added products to be “Approved.” You may see this from the Google & YouTube Shopify app and also from the Google Merchant Center’s ‘Products’ section.
Once you’ve added your Shopify products to the Merchant Center and they’re approved, you may already appear in Google’s free listings.
Great! You now have your free listings.
But it’s also crucial that these listings properly reflect the product you’re showing.
Step #3: Edit Product Details and Descriptions
You may need to edit product data, such as shipping information, images, titles, etc., for some products to be approved.
Also, merchants must know how to edit product data in case of updates.
If you’ve added the products through the Google & YouTube Shopify app, you may edit the products using the following three steps:

- Go to the Google & YouTube Shopify app.
- Click on Bulk Edit Products.
- Edit each product’s information and details as you see fit.
But if you’ve added products directly to the Google Merchant, you may use the following steps to edit the products:
- Go to the Google Merchant Center.
- Click on Products - All Products.
- Choose a Product that you wish to edit.
- Click on the Pencil icon adjacent to the product.
- Edit the product’s information and details.
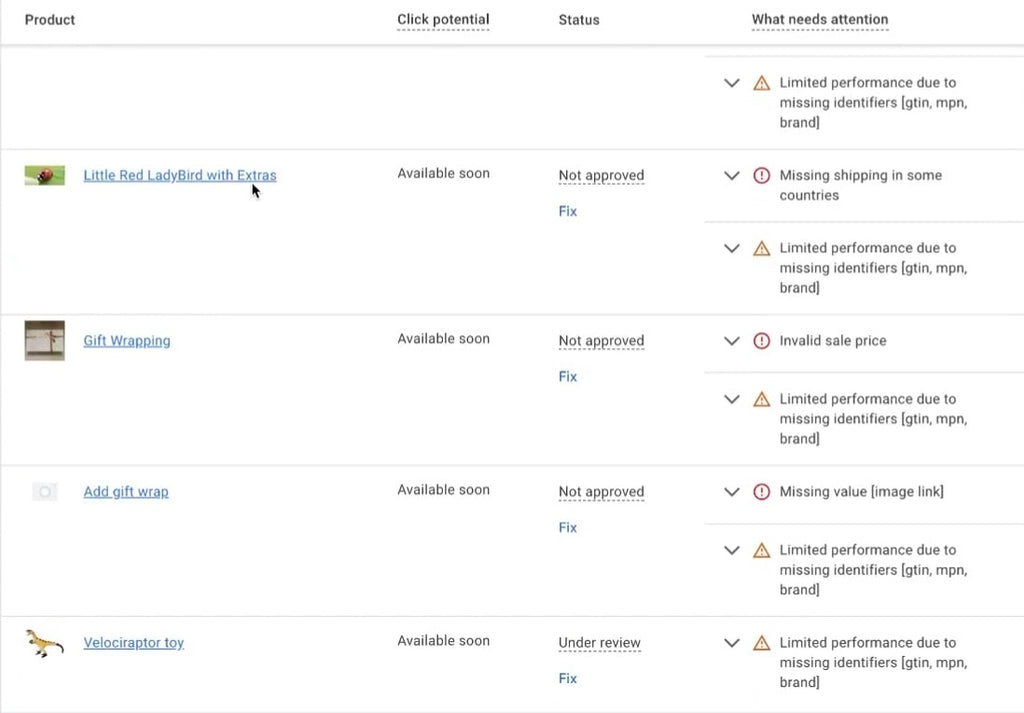
Sometimes, you need to edit product information according to Google’s policy for free listings. To understand why a product wasn’t approved, the following steps may give some clarity:
Source: Daniel Budai
- Go to the Google Merchant Center.
- Navigate to Products - Needs Attention.
- Pay attention to the red exclamation marks underneath ‘What Needs Attention.’ These indicate the reasons why a synced product isn’t approved on the Google Merchant Center.
- Make sure to amend these fixes
That’s essentially all you need to know to ensure your Shopify products appear for free on Google’s various platforms and services, including Google Maps and YouTube.
You may check your free listings in Google Merchant Center’s Free Listings section.
So where can you expect your products to appear?
Where do Free Google Merchant Listings Appear
Your free Google listings appear in five key areas of the Google platform. Note that this may change, considering Google’s continuously changing and improving search function.
Google Search Results Listings

When Google identifies that a user is searching for a specific item or browsing through Shopify collections, it will allow a significant chunk of the SERP to show relevant products to the searcher.
This featured snippet functions like a shopping search function, complete with filters that display free listings according to color, style, size, and other relevant filters.
Filters for free listings that appear for “leather shoes” may include shoe type (e.g., oxfords, loafers, sneakers), features, toe shape, and heel height.
Google Shopping Shopify

Google Shopping is Google’s dedicated shopping search feature. It retrieves Merchant Center listings instead of pages and displays them to searchers.
It also has a slightly different interface and a more robust set of filters from Google search.
Google Images

Your free listings will also appear for relevant Google image searches.
So if a product’s photo can appear for a particular image search query, the free listing for that product will display on the results.
It will have a distinguishing tag, however, letting searchers know that an image is of a product. The tag will inform searchers that the item they’re seeing on the Google Image search results is for sale.
In line with Google Images, your free listing may also appear for when phone users use their Google Lens function.
Google Maps Listings
If you have a business profile on Google and have successfully verified your physical location, your physical store will appear on Google maps.
But if you also have free product listings, your products may also appear on Google Maps, along with your location.
YouTube Listings
Regardless of whether you have a YouTube channel, your free listing may appear when YouTube users search for a video. So if YouTube thinks that a searcher wants to do more research on a type of product, YouTube will display listings in addition to video results.
Shopify Google Merchant Center Product Feed Optimization Tips
At this point in the guide, you should know now how to use free listings.
It’s great that you can display your products to searchers for free. But just like your pages’ attempt at SEO, you should also optimize your ‘Shopify Google Merchant Center Product Feed.’ These are your free product listings.
Some quick tips include using high-quality images, being concise and thorough with product details, and tracking your clicks—especially crucial if you are running a one product Shopify store that relies on focused product feeds.
Use High-Quality Images

In the first place, you should be using high-quality images that properly display the product front and center.
You may edit your Merchant Center listing images by going to Products - All Products.
Then click on the Pencil Icon next to the product you wish to edit.
Take note of the ‘Main Image.’ This will be the image that represents your product on the free listing placements.
It’s imperative that the image:
- Is clearly seen
- Is well-lit
- Is at the center of the frame
- Is captured at its best angle, typically from a 45-degree view to allow for depth
- Has a nice contrast from its background
Note that the Merchant Center’s limits for images are 64 MP and 16 MB.
Be Concise With Your Product Details
The Google Merchant Center has a dedicated set of fields when adding apparel products. These fields can be found underneath ‘Apparel product details.’
These fields include:
- Color
- Size
- Size system
- Gender
- Material
- Pattern
- Age group
Regardless of whether your listing is of an apparel product, be descriptive and detailed with your product details, particularly the description.
The description will help Google understand more about the product. It may help Google know how to filter your listing, allowing for more high-converting leads.
So if you're listing a bicycle, for example, you may want to indicate if it's an electric-powered one, if it's a mountain bike, its frame material, and its tire width, among other things.
Track Your Clicks

Source: Google Merchant Center
You'll see your product listings' click-through information in Products - All Products in the Google Merchant Center.
Pay attention to the Clicks and Click Potential columns of a listing.
Tracking this information allows you to see how your free listing is performing. This can inform changes such as changing the main photo or editing the description.These are the basic and most immediate optimization tips for your free listings.
But as you grow your customer base, you may want to explore adding star ratings to your free listings for better listing visibility.
Conclusion
Organic SEO is to pages what free listings are to your products online. A Google merchant center account allows for your store's discovery, not just on Google search but other sources of high-converting traffic too.
But to supplement these free listings, you may want to launch paid campaigns as well with Google Ads for a complete shopping campaign.
Shopify And Google Merchant Center FAQ
Yes. To do that, sign up for a Merchant Center account, install the Google & YouTube app on Shopify, and then follow the app’s instructions to successfully connect Shopify to Google Merchant Center.
After you add your products to the Google Merchant Center, wait for their approval. Once approved, they'll appear as free listings on various Google platforms, such as Google Search, Google Shopping, and YouTube.
Adding your Shopify products to the Google Merchant Center and getting them approved will create free listings for each of your Shopify products. This means they'll appear on Google Shopping.
