With over a million online ventures powered by Shopify, the platform has become a driving force in the contemporary e-commerce landscape. Therefore, mastering developing Shopify apps is not just advantageous—it's a necessity for businesses striving to maintain their competitive edge. This guide is your roadmap to success, offering a simplified, step-by-step approach to create Shopify app. Let’s dive in!
How To Create A Shopify App On Your Own: Preparation Guide
So, you've chosen to create a Shopify app and want to learn how to do it on your own. The steps outlined below will walk you through the process, helping you bring your app idea to life and integrate it seamlessly with the Shopify platform, even if you're not working with Shopify experts.
Become a Shopify Partner - Sign up for an account to access Shopify app development resources

Sign up for Shopify Partner
To kickstart your journey on how to create a Shopify app, A Shopify Partner account in the Partner Dashboard is necessary. Signing up as a Shopify Partner is a straightforward process, requiring you to visit the Shopify Partners website and follow the prompts to create an account.
Once registered, you gain access to the Partner Dashboard, a central hub housing a wealth of resources tailored for Shopify create app development. Here, you'll find documentation, Shopify API access references, development tools, and access to the Shopify Partner Academy, offering courses and certifications to enhance your skills and understanding of the Shopify platform.
Create a Development Store - Set up a free online store for testing your app quality

Create a Development Store on Shopify
Once you've become a Shopify Partner, it's time to set up a development store. This online store will serve as your testing ground throughout the Shopify app development process. Shopify offers the option to create a development store for free, allowing you to experiment with your app quality without impacting live customer stores.
- Step 1: Access your Partner Dashboard and sign in
- Step 2: Click on "Stores"
- Step 3: Select "Add store" from the available options and click on "Development store."
- Step 4: Fill in the necessary details in the Login information section, including a name for your store and a password for logging in.
- Step 5: Activate a developer preview by ticking the box for "Create a non-transferrable store that uses a developer preview" and choosing a version from the drop-down list (optional)
- Step 6: Provide your address under the Store address section
- Step 7: Save your changes by clicking the "Save" button
Install Node.js - Ensure you have the latest version installed
Node.js is a prerequisite for many modern web development workflows, including Shopify app development. You can visit the official website to download and install the latest version compatible with your operating system.
Install Shopify CLI - Install the Shopify command-line tool for streamlined development

Install the Shopify command-line tool (source: Shopify)
The Shopify Command Line Interface (CLI) is a powerful tool designed to streamline the Shopify app development workflow. It offers various commands and utilities that simplify common tasks, such as creating new Shopify apps, managing app configurations, and deploying updates.
For Windows 10, first install Ruby+Devkit (version 2.7+) via RubyInstaller. Alternatively, use Shopify CLI with Windows Subsystem for Linux, requiring:
- Windows Subsystem for Linux
- Ubuntu VM
After setup, install Shopify CLI as a Ruby gem “gem install shopify-cli” and verify installation with “shopify version.”
Connect to Shopify with CLI - Log in to your Partner account through the CLI
Once Shopify CLI is installed, you'll need to connect it to your Shopify Partner account. This step enables seamless interaction between your development environment and Shopify's platform, allowing you to authenticate, access resources, and deploy your app with ease.
Use the “shopify login” command to authenticate with your Shopify Partner account.
Project Setup
In the initial phase of creating a Shopify app, known as "Project Setup," several essential steps need to be done:
Create App Project - Use the Shopify CLI to create a new project directory

Create App Project on Shopify
After successfully installing Shopify CLI, the next step is to begin a new project for your new app. To do this, navigate to the directory where you want your project to reside. Once you're in the desired directory, execute the command “shopify app create node”. This command not only creates a new project but also generates a Node.js app within a subdirectory. Additionally, it automatically registers your app in the Partner Dashboard, streamlining the initial setup process.
Launch Development Server - Start a local server within your project for testing
You can initiate the development server setup by learning how to create app for Shopify store. This local server acts as a controlled environment where you can test your app's functionalities in real-time.
By executing a command such as “shopify serve”, you start this server, enabling you to preview changes, interact with your Shopify app, and debug as necessary. This step is crucial for iteratively refining your app's features and user experience.
Install App on Dev Store - Connect your Shopify app store to your development online store
With the development server up and running, the final step in project setup is to install your app on your development Shopify store.
To do this, open the unique HTTPS URL provided in your terminal after starting the local server. This URL serves as a gateway for installing your app on your development store. When you open the URL in your browser, you'll be prompted to complete the installation process.
Building the Shopify App
Next, you need to build a Shopify app. It involves several key steps to develop its core functionalities.
Start Building - Begin coding your app functionalities using Node.js and Shopify’s APIs
This step involves implementing the logic and features that your app will offer to Shopify merchants:
- Node.js for server-side development
- Shopify’s APIs for store data access and action performance
Your final app will be simple, but you’ll learn where to find resources to add features on your own.
Populate Products - Add sample products to your development store

Add sample products on Shopify
Adding sample products to your development Shopify app store allows you to test your app's functionality with actual product data and ensures that it behaves as expected when integrated with a Shopify online store.
With Shopify CLI, you can easily generate records for products, customers, and draft orders:
- Step 1: Open a new terminal window
- Step 2: Navigate to your project directory
- Step 3: Execute “shopify populate products”
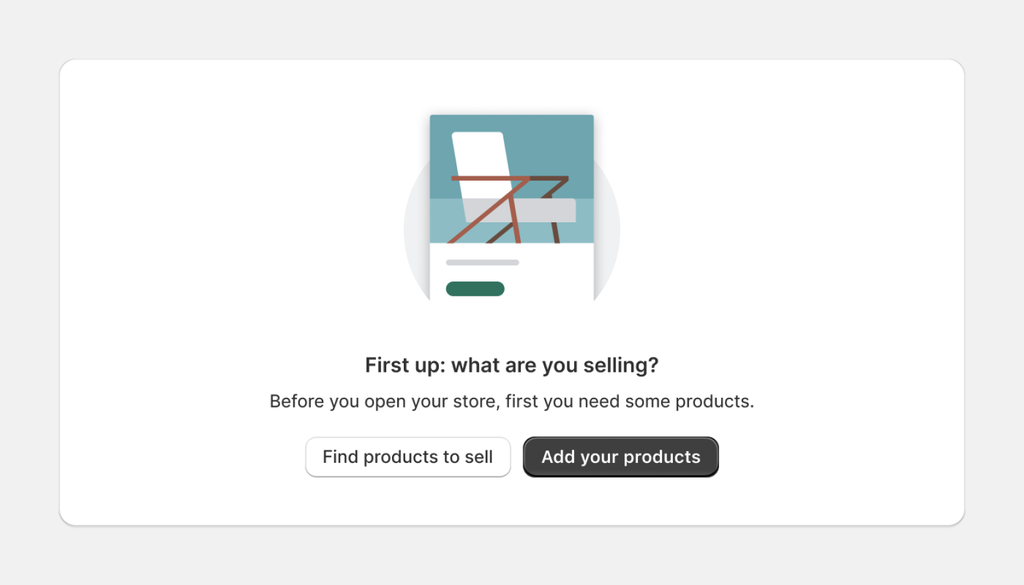
Handle Empty States - Create visuals for when no products are present

Learn to handle empty states
With your app running in Shopify, you can test frontend components as you build them. Designing clear and intuitive empty states ensures that users understand the context and can take appropriate actions, such as adding products or navigating to relevant sections.
Polaris, Shopify’s React component library, is a perfect option to enhance your user interface.
- Step 1: Navigate to your pages/index.js file in your code editor
- Step 2: Replace its contents with the EmptyState component
Implement Resource Picker - Build a UI element for selecting specific products

How to Implement Resource Picker
Resource picker enables Shopify merchants to choose products to apply certain actions or settings, enhancing the flexibility and usability of your Shopify app store.
First, you need to add a resource picker. Some standalone apps like App Bridge, Shopify's vanilla JavaScript library, can do this job for you. It provides a search-based user interface, facilitating efficient product selection.
- Within your pages/index.js file, define a class to manage the resource picker's state
- Integrate the “ResourcePicker” component into the primary action button on the “EmptyState” component for seamless functionality
Display Product List - Create a dynamic user interface to list products

Display Product List on Shopify
You've integrated a GraphQL query to fetch product data and showcased it in a resource list within your Shopify app store. Now, you're gearing up to leverage GraphQL mutations for modifying product data.
- Step 1: Create a new JavaScript file named ResourceList.js.
- Step 2: Inside this file, import the necessary libraries. These libraries will allow you to define GraphQL queries and fetch data using Apollo Client.
- Step 3: Run “npm install store-js” in your terminal to install the store-js library. This library provides utilities for managing data within your app.
- Step 4: After defining the GraphQL query in ResourceList.js, you can create a class called “ResourceListWithProducts” if needed, although it's not explicitly mentioned in the steps you provided.
- Step 5: Use the “ResourceList” component where necessary, such as when displaying the empty state of your Shopify app store.
Update Product Prices - Develop functionality to update product prices

Update Product Prices on Shopify
This feature enables Shopify merchants to adjust pricing efficiently, saving time and streamlining their workflow. Now, you're ready to enhance functionality by utilizing GraphQL mutations to modify product data.
To achieve this, you'll create a new JavaScript file named “ApplyRandomPrices.js” within the components folder. You'll import necessary dependencies and set up a GraphQL mutation named “ProductVariantUpdate”, enabling your Shopify app store to update product prices.
Following the mutation setup in “ApplyRandomPrices.js”, you'll establish a class named “ApplyRandomPrices”, designed to handle the input parameters of your mutation and apply random prices to the selected product.
Conclusion
In conclusion, the journey to solve the question “How to create Shopify app?” may seem daunting, particularly for beginners in the realm of Shopify app store development. However, by following this step-by-step guide meticulously, even newcomers to the process can navigate through the complexities and ultimately emerge with their own fully-functional Shopify app. We wish you the best of luck!


![2025 年のベスト Shopify ページ ビルダー 15 選 [詳細なレビュー付き]](http://pagefly.io/cdn/shop/articles/best_shopify_page_builders_-_2025.png?v=1737451444&width=1640)


![オンラインストア向けの無料 Shopify ファネル ビルダー 8 選 [2024]](http://pagefly.io/cdn/shop/articles/10-Shopify-Funnel-Builder-Apps-That-You-Can-Use-To-Boost-Your-Sales.jpg?v=1735219962&width=1600)


