Running an online store on Shopify, especially a large inventory shop with a high volume of product media, can be tricky. However, managing these Shopify files efficiently helps you run your business with minimal hassles.
Picture this — You are adding new products to your store, and suddenly, in your vast collection of files, you are not able to find your product images. In some cases, you might not know how to upload a particular file. It happens. But don't worry; this article aims to solve the challenges you face with Shopify Files and share best practices that make the process effortless.
We will also look into the importance of proper file organization, explore the different file types you can upload, and guide you through the upload process with detailed steps. And finally, we will take you through some of the best practices for troubleshooting
Understanding Shopify Files
Let's begin by understanding what the term "Shopify Files" means and what type of files you can ideally upload and manage from the Files page on the Shopify admin space.
Files on Shopify usually include the following:
- Images and videos for your blog posts, website, and theme.
- Product videos and images.
- Downloadable files for your customers.
- Images and files connected to metafields.
If you upload your files while editing the theme or when using the text-rich editor, you can view and manage them on the Files page.
Why Does Proper File Management Matter?
Improper file management doesn't just make editing your theme or products difficult. It can also significantly impact your site's performance. Managing your Shopify files will help in:
- Ensuring that your website loads quickly. Large, unoptimized files can slow down your site, negatively affecting user experience and potentially driving visitors away.
- Quickly finding your uploaded products requires good organization and proper naming techniques. This includes naming your files properly with alt texts and clear file names. This, in turn, helps search engines understand the content and relevance of the image, resulting in faster indexing and better rankings.
- It also simplifies site updates and maintenance. When files are systematically organized, locating and updating them becomes easier, ensuring that your website remains up-to-date and functional without unnecessary downtime.
In short, proper file management enhances your site's speed, improves SEO, and ensures a seamless user experience while making ongoing maintenance more efficient.
File Upload Shopify: Types, Sizes, Resolutions
Shopify allows you to upload various file types essential for running your eCommerce store, such as product media. This includes your images, 3D models, and videos.
High-quality media is vital to enhancing your customers' understanding of product functionality and size, thereby boosting confidence in product quality.
Here are the supported product media file types and the requirements you need to follow for each of them:
Images
- File Types: PNG, JPEG, PSD, TIFF, BMP, GIF, SVG, HEIC, WebP.
- Resolution: Up to 5000 x 5000 pixels or 20 megapixels.
- File Size: Less than 20 MB.
- Tips: High-resolution images (e.g., 2048 x 2048 px for square images) look professional. Use a consistent aspect ratio for uniform display on collection pages.
3D Models
- File Types: GLB, USDZ.
- File Size: Up to 500 MB (files over 15 MB are automatically optimized for size and performance).
- Display: Customers can view 3D models from the website interface orin their environment using their device’s camera.
Videos
- File Types: MP4, MOV.
- Length: Up to 10 minutes.
- Resolution: Up to 4K (4096 x 2160 px).
- File Size: Up to 1 GB.
- Embedding: YouTube and Vimeo links are supported for videos beyond these specifications.
For other files, you can follow the formats and requirements given below:
- Generic Files: Any file type except HTML, up to 20 MB. These files can be downloaded by customers.
- Paid Plans: Any file format except HTML.
- Trial Plans: Limited to JS, CSS, GIF, JPEG, PNG, JSON, CSV, PDF, WebP, HEIC. Email verification is required to upload PDFs.
Different sections of your store, such as themes, pages, and blogs, support specific file formats. If you are planning to include large-size and resolution videos, use YouTube or Vimeo links.
Getting Started With Shopify Upload Files
Let's get started on working with Shopify files. First up, we will discuss the steps for accessing the Files page, to upload your first file.
Accessing the File Upload Feature in Shopify
To start uploading files in Shopify, follow these steps:
Navigate to the Files Page:

- Step 1: From your Shopify admin, go to Content > Files.
- Step 2: Click Upload files.
- Step 3: You can select up to 20 files from your computer and click Open. Ensure each file meets Shopify’s size and format requirements.
On the same page, you can also find options to search and filter files, as well as a toolbar for sorting and managing files.
Saving Filter Views:

- If you frequently search for files using the same criteria, you can save these filters as views.
- Apply your desired filters using the Search and Filter option, then click Save as.
- You will need to name this saved filter view in the dialog that appears, and click Save. This creates a new tab at the top of the Files page for easy access.
Changing Sort Order:

By default, files are sorted from newest to oldest. To change this, all you need to do is, click the sort icon (⇅) and choose to sort by name, size, or date in ascending or descending order.
Deleting Files:

- Step 1: To delete files, go to Files, and select multiple files or a single file.
- Step 2: Click on Delete, and then Delete again to confirm.
When you are uploading files, make sure you name them descriptively. For example, instead of saving your file as "1456.JPG", you can save it based on what the file contains, such as "home-page-banner-image."
This will also make it easy to categorize your files into folders, making them easier to find.
Bulk Uploads and Automation

You can also upload files in bulk, to your Shopify store by following these steps:
- Select all the files you want to upload using Ctrl + C or by dragging your cursor, and click Open.
To bulk upload products using a CSV file,
- Step 1: First export your products from Shopify.
- Step 2: Edit the CSV file using a spreadsheet program like Google Sheets.
- Step 3: Go to Products in your Shopify admin and click Import.
- Step 4: Click Add file, select your CSV file, and then click Upload and continue.
- Step 5: Review the import details and click Import products. Shopify will send a confirmation email once the import is complete.
Uploading files in bulk in CSV format could result in some error, in certain cases. To avoid this, you need to ensure they are correctly formatted and free of errors before uploading. You need to also,
- Regularly back up your product data and media files.
- Keep your file system organized by periodically reviewing and deleting outdated or unnecessary files.
Shopify Image Upload: Best Practices
To upload and manage image files in your Shopify store, here are some best practices:
Best Practices for Uploading Images to Shopify
To ensure you do not face any errors or failures while uploading your images, follow these best practices:
- Product Images: Use PNG or JPEG formats for high-quality product images. Optimal dimensions are up to 2048 x 2048 px. While Shopify allows a maximum file size of 20 MB, you should manually compress the images to be as small as possible for page performance optimization.
- Banners and Thumbnails: JPEG or PNG formats work well for banners. Thumbnails should be smaller to ensure quick load times.
- General Guidelines: Shopify's Imagery service automatically selects the best format (JPEG, PNG, WEBP, etc.) supported by the customer's browser.
- Manual Compression: Use tools like TinyPNG or ImageOptim to reduce file sizes without compromising quality.
- Automatic Compression: Shopify compresses images automatically, but starting with optimized images ensures even better performance and faster upload.
Using Shopify’s Built-in Image Editor

Adding image files to your store is a straightforward process. Using Shopify’s built-in image editor, you can also make basic image adjustments directly within the admin panel.
These features within the editor include:
- Crop and resize to adjust image dimensions to fit specific areas of your store.
- Basic photo editing tools to adjust brightness, contrast, and other visual aspects.
- Rotation and flip to correct the orientation.
To upload images,
- From your Shopify admin, go to Products and select the product you want to edit.
- In the Media section, click on the image you want to edit.
- Use the available tools to crop, resize, enhance, rotate, or flip your image.
- Click Save to apply the changes.
Unfortunately, Shopify doesn't offer any advanced editing tools. Instead, you can consider Adobe Photoshop, GIMP, or similar tools for the same.
Organizing and Managing Image Files
Organized image files help maintain a streamlined workflow and ensure your store is easy to update. To do so, here’s what you need to know:
Creating Views:
- Use a consistent naming convention for views created to categorize images by type (e.g., product images, banners, blog images).
- Example views include Products, Home page, About us, Electronics, etc.
Tagging and Labeling Products:

- Use product tags to find product media easily, on the product page along with other information.

- Example tags: “Summer Collection”, “New Arrivals”, “Sale Items”.
Ensure that all images being used are up-to-date and relevant to your current inventory and promotions.
Deleting Image Files on Shopify
You can delete media individually or in bulk from your Shopify admin.
Delete Images Individually:
Removing a file from a product doesn’t delete it from your store. To delete it completely, you must remove it from the file manager.
- From your Shopify admin, go to Products.
- Click the product you want to edit.
- In the Media section, click the uploaded files you want to delete.
- Click the trash can icon and confirm by clicking Remove file.
Delete Images in Bulk:
If you are planning to delete images in bulk, do note that the selected files, if any, are used elsewhere in your store, they are only removed from the product being edited.
- From your Shopify admin, go to Products.
- Click the product you want to edit.
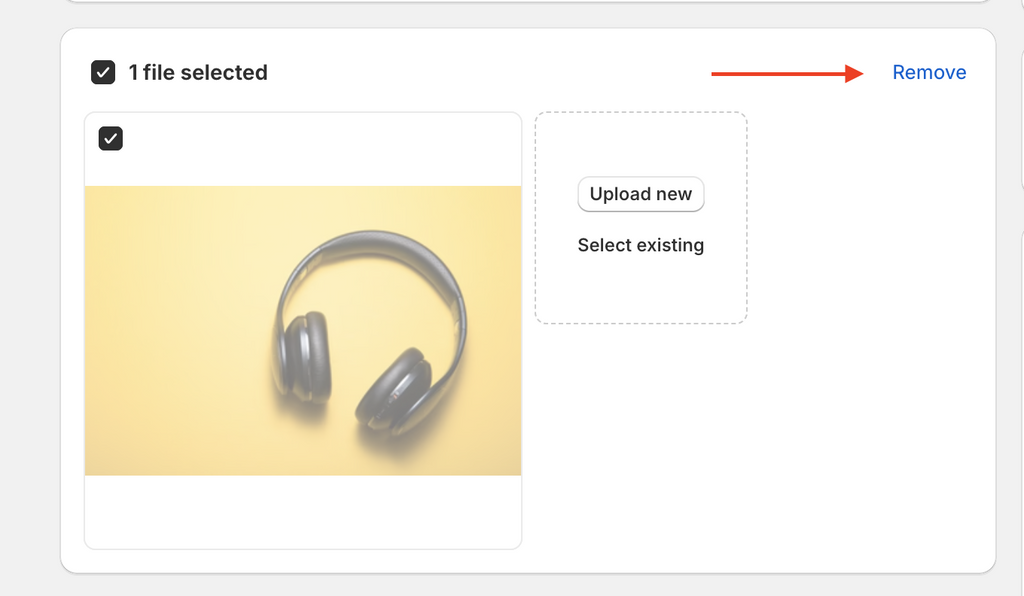
- In the Media section, select the media to delete using checkboxes.
- Click Delete files and confirm by clicking Remove.
Uploading and Managing Other File Types: PDFs, 3D Models, and Videos
To upload documents and media files such as PDFs, documents, videos, 3D models, and audio files to Shopify, navigate to the Filespage, and follow these steps:
Document and Media File Uploads
- From your Shopify admin, go to Content > Files.
- Click Upload files and select up to 20 files to upload.
- Click Open to complete the upload process.
If you are using 3D models, you can upload them via the product page. However, you need to ensure your Shopify theme supports it first. You can find those themes here.
Updated versions of most Shopify themes do support this feature. In the unlikely case that it doesn't, you can modify your current by editing its code or with the help of a Shopify Partner.
Handling Large Files and File Storage Limits
Managing large files like video files without compromising site speed is crucial. Here are some strategies:
External Storage Solutions:

- For large files exceeding Shopify's 20 MB limit, consider using external services like YouTube or Vimeo for videos. Embed these videos in your Shopify store by linking to the hosted content.
- Use services like Dropbox or FTP for storing and linking large documents or media files. This offloads the storage burden from Shopify and keeps your site running smoothly.
Shopify’s Storage Limits:
Shopify has hosting limits for videos and 3D models, which vary according to your Shopify plan. For instance, Starter and Basic plans support up to 250 hosted media files, while higher plans allow more. So, plan your file management strategy according to your Shopify plan's limits.
Customizing Media Display
You can utilize metafields to manage how media files are displayed. Metafields allows you to create file references that can be linked to specific products or content areas.
For advanced customization, modify your theme code or hire a Shopify Partner to add media support. This ensures optimal integration of media files into your store's design and functionality.
Best Practices to Resolve or Troubleshoot File Uploads in Shopify

Common issues you may face, include:
- File size exceeds Shopify's limits.
- Unsupported file formats.
- Upload fails midway or doesn’t start.
- Slow upload speeds.
- Browser compatibility issues.
- Shopify server downtime.
Hence, we have created this easy-to-follow checklist that consists of best practices, tips, and instructions that you can use to troubleshoot file uploads on Shopify.
- Ensure your file name does not contain special characters.
- Split large files into smaller parts.
- For upload failures, temporarily disable browser extensions or ad blockers.
- At the time of uploading, check your internet connection stability.
- Clear browser cache and cookies to avoid errors.
- Try uploading using a different browser or device if you face any issues.
- Ensure Shopify is not experiencing downtime (check the Shopify Status page).
- Use a high-speed internet connection.
- Upload files during off-peak hours to avoid server congestion.
- Perform a speed test to check your internet connection.
- Restart your router or modem.
- Update your browser to the latest version.
- Disable other active uploads or downloads on your network.
- Access the Shopify support team via the Help Center.
- Use the live chat, email, or phone options for direct assistance.
- Search for articles and guides on file uploads at the Shopify Help Center.
- Join discussions and seek advice from other Shopify users.
- Follow recommended Shopify blogs for tips and updates.
- Watch tutorials on YouTube channels like Shopify’s official channel for step-by-step guidance.
Final Thoughts
Organizing and managing Shopify Files is easy as long as you follow the steps detailed above.
Remember, a well-organized file vault translates to a smoother workflow for you and a more enjoyable experience for your customers. With this guide, you can achieve faster loading times, easier access to information, and a professional storefront presentation.
So, put these practices into action and have a hassle-free experience with Shopify files!
Quick read: 5 Ways to Optimize the Shopify Product Image Size for your Online Store