Businesses with tons of Shopify products typically organize items using collections. Each collection represents a category (e.g., men’s, women’s, kids, etc.), allowing merchants and shoppers to navigate an immense catalog easily.
But merchants need a feature that shows all these collections in a non-cluttered display.
That’s where a Shopify mega menu comes in.
What is a Mega Menu Shopify

Source: Maguire Shoes
A Shopify Mega Menu is a complete view of a menu item’s navigation tree.
- It presents all options of a nested series on a clean slate, columned according to parent categories
- Mega menus may also contain images for better visitor engagement and site experience.
As a result, mega menus make site navigation more streamlined and intuitive.
These benefits result in an exponentially improved user experience that large catalog businesses can thrive from.
Incorporating Shopify trust badges into the mega menu can further enhance customer confidence, especially when badges are positioned within menu links to popular product categories. These elements, along with well-organized menus, make site navigation more streamlined and intuitive.
But how does the mega menu fare against the other header menu types, such as the dropdown and the drawer?
Shopify Mega Menu vs Dropdown vs Drawer
A mega menu isn’t for every merchant. While it can certainly highlight loads of collections, it may not be beneficial for every type of merchant.
Mega Menu

Source: Kylie Cosmetics
In terms of Shopify mega menu vs dropdown, a mega menu spans across the length of the screen, occupying a significant chunk of screen space. Because of this, mega menus work best on desktop versions of sites. Not so much as a mobile menu.
Nonetheless, it’s effective for displaying a vast catalog.
Dropdown

Source: Bebemoss
Whereas a dropdown menu displays categories one sublevel at a time. You’d need to click the dropdown arrow to reveal the next sublevel of items. While this may be less instantaneous, it provides sites with a cleaner, more basic appearance.
Drawer

Source: Kulala
A drawer functions like a dropdown, displaying lists of items one sublevel at a time. But instead of dropping down from the header, it slides out from the side of the page. This provides the cleanest site appearance out of the three, collating the entire main menu navigation into a hamburger icon.
If you feel that a mega menu works best for your Shopify online store, keep reading. We’ll show you how to set one up.
How to Set Up a Shopify Mega Menu?
Setting up a Shopify Mega Menu involves three steps—setting up your collections, updating your navigation, and creating a mega menu.
Step #1: Create Parent and Sub-Collections
Before you can fully utilize a mega menu, you’ll need to set up parent and sub-collections first.
We'll use automated collections and tags for this. So be sure to add tags to your products.

To create an automated parent collection, follow six steps:
- Go to Products - Collections.
- Click Create Collection.
- Input the parent collection’s details into the available fields.
- Make sure to select Automated as the Collection type.
- In the Conditions section:
- Tick on All Conditions in the ‘Products must match’ selection.
- We suggest adding a Tag condition and setting it to the parent collection’s category (e.g., Men, Women, Kids).
- Click Save.
Do this for every parent collection. You can have a parent collection for men’s clothing and another one for women’s clothing. Your setup may differ.
To create automated subcollections, repeat the above set of bullet points. Albeit with the changes listed below:

- In the Conditions section:
- Tick on All Conditions in the ‘Products must match’ selection.
- Add an additional Tag condition that must be met. (e.g., if you’ve set the parent collection's Tag condition to ‘Men’s,' you may want the subcollection’s Tag conditions to be ‘Men’s’ and ‘Tops,’).
- Click Save.
That way, the subcollection will contain men’s tops. Repeat this process for men’s bottoms, men’s coats, etc.
Once you have your collections, you’ll need to update your navigation.
Step #2: Update Your Navigation
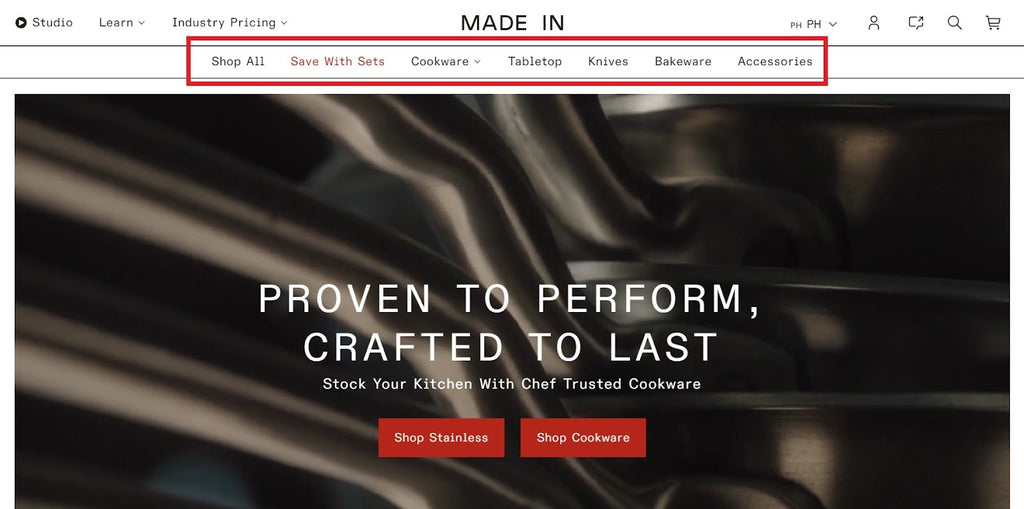
To set up your navigation,
- Go to Online Store - Navigation from the Shopify admin.
- Add the following menu items:
- Add a ‘Collections’ or ‘Products’ menu item. This will be your umbrella category which all the parent and subcategories will fall under.
- Add Menu Items for each Parent Category of your Collection (e.g., Men’s, Women’s Kids; Summer, Winter, Autumn; etc.)
- Add Menu Items corresponding to each Subcollection of each Parent collection (e.g., Men’s tops, Men’s shoes, Men’s underwear, etc.)
- Drag the subcategories underneath their corresponding parent categories.
- Click Save.
So your nested menu should appear like this:

You may also set the umbrella categories as ‘Men’s,’ ‘Women’s,’ ‘Kids’,’ instead of ‘Collections.’ How you set your navigation up will depend on how many sublevels your catalog requires.
Now that you have your nested navigation, we may proceed to set up the mega menu.
Step #3: Create a Mega Menu
There are tons of ways to go about setting up a mega menu. So we’ve picked out three common and easy methods to go about it.
This includes 1) using Dawn, 2) using third-party apps, or 3) using third-party themes to craft a compelling mega menu for our site.
Method #1: Using Dawn

If you’re using Dawn and want to add a mega menu for your online store,
- Go to the Shopify Theme Editor.
- Select the Header section underneath the Header segment.
- A menu will appear on the right. Here, set the ‘Desktop menu type’ to Mega menu.
Your header main menu will now be a mega menu format.
Note that this approach is relatively limited in terms of customization. If you want to add photos to your mega menu, you’d want to use third-party apps or paid themes.
In that case, keep reading.
Method #2: Using a Shopify Mega Menu App
Different guides may be written for various mega menu apps.
We’ll use Globo Mega Menu app for this guide because of its mega menu customization. This Shopify mega menu app lets merchants add images to their mega menus for free.
This section will be brief since the app takes time to explore, much like the Shopify Theme editor. Make sure to explore the app on your own time.
- Install the Globo Mega Menu.
- Launch the app.
- Go to Menu Manager and click Create Menu.
- Select Mega Menu from the dropdown.
- Like Shopify’s theme editor, the Globo app’s menu builder is centered on blocks and sections. With this in mind, create your desired header menu.
- Once you’re done, click Publish.
- You’ll be taken to the App Embeds section of your current theme. Tick on the Mega menu embed.
Additionally, you may want to leverage relevant Shopify plugins that can add extra functionality to your mega menu, such as search bars, countdown timers, or promo banners, making navigation even more interactive.
At the basic level, this is how you’ll add a mega menu using a third-party app. You may spice your menu up by adding photos, editing the color scheme, and changing the font.

To add an image,
- Click + Add Block under any menu item.
- Select the Image tab.
- Choose between two styles — Image 1 and Image 2
- Click Select Image and apply an image.
- Input a Title, Description, and Link for the image.
- Adjust its width as well to enlarge or shrink the image.
- Click Apply Changes.
- Click Save then Publish.
Preview the changes you’ve made by going to the Shopify Theme Editor or the live site.
Another method of adding a mega menu to your store is using themes. This approach is ideal for those who want to reduce their app use.
Method #3: Using Shopify Themes with Mega Menu

Note that paid themes are vastly different from each other. Not every paid theme will have mega menus. So make sure to use the free trial available before paying.
Some Shopify themes with mega menu include Shine, Xclusive, Blum, Electro, and Concept. We’ll use the Shine Shopify theme for this guide due to its visual menu options, extensive utility, and friendly price point.
Adding a Mega Menu Using Shine
The mega menu option is a regular mega menu with an option to add images.

To add one to your store after installing Shine,
- Add a Mega Menu block underneath the Header section.
- Click on the newly created Mega Menu block.
- Settings will appear on the right. Underneath the ‘Menu item name’ field, enter the title of a nested category in your menu.
This will turn the menu item from a dropdown into a mega menu.
You may also add photos to this mega menu. These may either be decorative or links to other collections or product pages.
Save your changes once you’re satisfied with your mega menu.
Adding a Collections Menu Using Shine
Another mega menu type that Shine provides is one dedicated to collections.

The ‘Collections Menu’ adds one menu item to the header directly from the Shopify theme editor. So you don’t need to go to the Navigation settings to tweak anything.
Each collections menu displays the nested items as images.
You can utilize Shine’s ‘Collections Menu’ in three steps.
- Add a Collections Menu block underneath the Header section.
- Click on the newly created Collections Menu block.
- In the settings that appear, type in the ‘Menu item name.’
- Click on Select Collections to add collections.
- Repeat this process for every nested menu item you want to appear on the main header.
While these steps may be unique to Shine, other paid themes may work in a similar manner. Explore a theme in the Shopify theme editor if you’re primarily getting it for a mega menu. That way, you’ll know what you’re getting.
Shopify Mega Menu Examples
Now that you know how to 'add mega menu' to your website navigation, you might want to take inspiration from some real-life business websites.
These are excellent Shopify mega menu examples to follow.
Cocofloss

When customers click on the Cocofloss’ 'Shop' menu item, a mega menu drops down, presenting all possible shop options in a visual format.
This presents’ Cocofloss site navigation in a clear, understandable, and engaging format.
Tentree

Instead of using one main umbrella menu item such as 'Shop' or 'All Products,' Tentree opted to make their clothing categories their own menu item on the header's main menu.
Each mega menu also has a supplementary image, adding more imagery to the site.
Bebemoss

Instead of photos, Bebemoss uses a brand font on top of brand colors. This effectively calls attention to the primary text and reinforces brand identity.
Shopify Mega Menu App
We mentioned earlier that merchants can add mega menus to their stores using mega menu Shopify apps. We’ve illustrated this using the Globo Mega Menu app.
Other reliable mega menu apps include the Buddha mega menu app, quikify’s mega menu app, and the Meteor app.
Buddha Mega Menu & Navigation
The Buddha mega menu app allows merchants to create a multipurpose mega menu.
Users can add blogs, collections, and products, among other things, in the modular sections of the mega menu. It even includes a Contact form submenu for an immediate contact function.
While it may offer relatively premium features for its free plan, this app isn’t beginner-friendly.
It doesn’t provide mega menu templates nor does it have an intuitive builder interface.
qikify Mega Menu & Navigation

The quikify mega menu app provides extensive customizability for mega menus, allowing merchants to customize menu animation and color, in addition to menu items.
It also comes with menu templates to help merchants get a quick start on their work.
Meteor Mega Menu
The Meteor mega menu is the simplest, most straightforward, and most beginner-friendly mega menu app out of the three listed. This makes it an excellent option for Shopify starters.
But note that you’ll have to subscribe to a more premium plan for some basic customization options, such as adding images.
Conclusion
Your mega menu will vary depending on the type of business and how your catalog is categorized. There's no wrong way to go about it. Just remember to look at it from the eyes of a site visitor. You may also consider integrating some of the best Shopify apps to improve overall functionality, ensuring a smoother and more engaging customer experience.
At a glance, could you navigate to the collection you want to explore?
With these tips in mind, you're ready to create a compelling, interactive website first fold. Get more sales now!
Shopify Mega Menu FAQ
A mega menu shows an umbrella category's subcategories in a wide, spaced-out, and streamlined view. It is more suited for desktop screens due to its layout, which may not display as effectively on mobile devices.
You should use a mega menu when you want to:
- Minimize the main menu items on the header
- Organize a massive catalog efficiently
- Enhance the site experience with a more visual and navigable menu
If you are using the Dawn theme, navigate to the Shopify Theme Editor. Select the Header section, and a menu will appear on the right side. Under the 'Desktop menu type' option, click on the Mega Menu tab to enable and configure it.









![27 Best Shopify General Stores + Complete Strategy Guide [2025]](http://pagefly.io/cdn/shop/articles/Best_Shopify_General_Stores_2f9d09f2-7c38-4da9-a495-e9f4898ddd68.jpg?v=1757271936&width=1640)

