![Migrate Shopify to Shopify: The Complete Guide [2025]](http://pagefly.io/cdn/shop/articles/Migrate_shopify_to_shopify_1_09d3dfec-1d12-4df3-85c7-13e09a3314ec.png?v=1743144496&width=1640)
If you have decided to migrate a Shopify to another Shopify store, you must know the essential details and techniques.
Without it, you may forget to back up data and lose it. Or might even miss key product or customer details during data migration.
These roadblocks can jeopardize your efforts to migrate Shopify to Shopify.
But don’t worry, this guide will walk you through how to migrate Shopify to Shopify efficiently, ensuring that your Shopify migration process is smooth and successful."
We also talk about the mistakes you must avoid for a seamless migration and much more.
Now that we are set with our goal, let us see how you can successfully migrate your current Shopify store to a new one.
Why Migrate A Shopify To Another Shopify Store?
If you are not completely sure, why you must switch to a new Shopify store, here are some possible reasons that you must consider:
- Migrating to a new Shopify store gives your business a rebranding opportunity that can help you create a store with your new vision and business goal.
- A new Shopify store can open opportunities to integrate with different apps and services that may not be available in your current Shopify store.
- You can better manage your incoming traffic if your current store is struggling with managing the current traffic that is coming in. This way, you can optimize various user experience elements of your store as well.
- A new store allows you to start fresh with security best practices in place. With updated SSL certificates, you can get rid of vulnerabilities in old plugins and themes.
- A new store has updated technologies that make it easier to organize products, visualize sales insights, and optimize ongoing management, compared to legacy ones.
How To Migrate Shopify To Shopify?
Now let us see how to perform Shopify to Shopify migration easily. Follow these steps closely.
Step 1: Create a new Shopify account
To move your older Shopify store to a new one, you need to first have a new Shopify store. You can create this by going to the Shopify website and clicking the ‘Start free trial’ button.
You can start the plan for a free trial and choose the plan you wish to have after the trial.
Step 2: Shopify data migration - Export data
Once your new store is ready, the next step is to migrate Shopify to another Shopify store by exporting data. This step is critical for ensuring a seamless Shopify store migration. If you’re unsure how to migrate Shopify to Shopify, following these steps can help avoid common pitfalls.
The data includes things like your products, customers, orders, etc., along with any other information you need to be transferred to the new store.
Export products
Here, we will start by exporting the products from your old store. Follow the steps below.
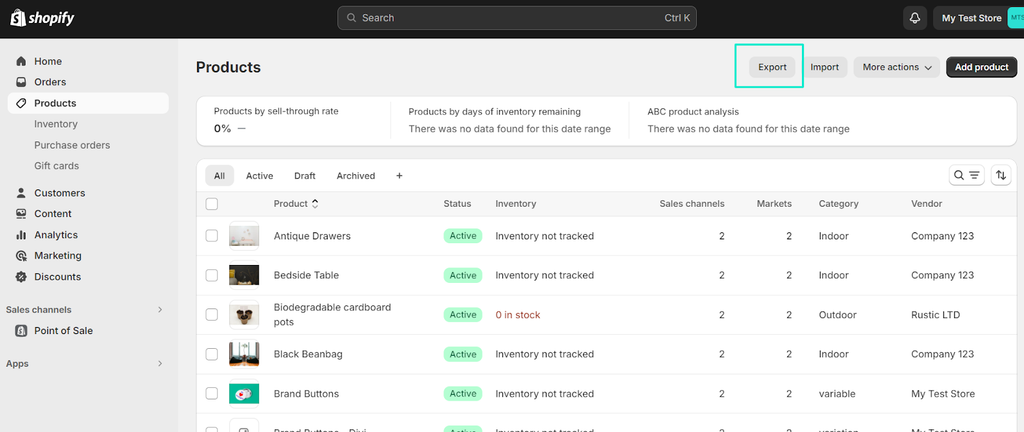
Go to your Shopify admin of your old site. Click Products to go to the page with all products.
You will reach the Products page. In the upper right-hand corner, click the “Export” button.
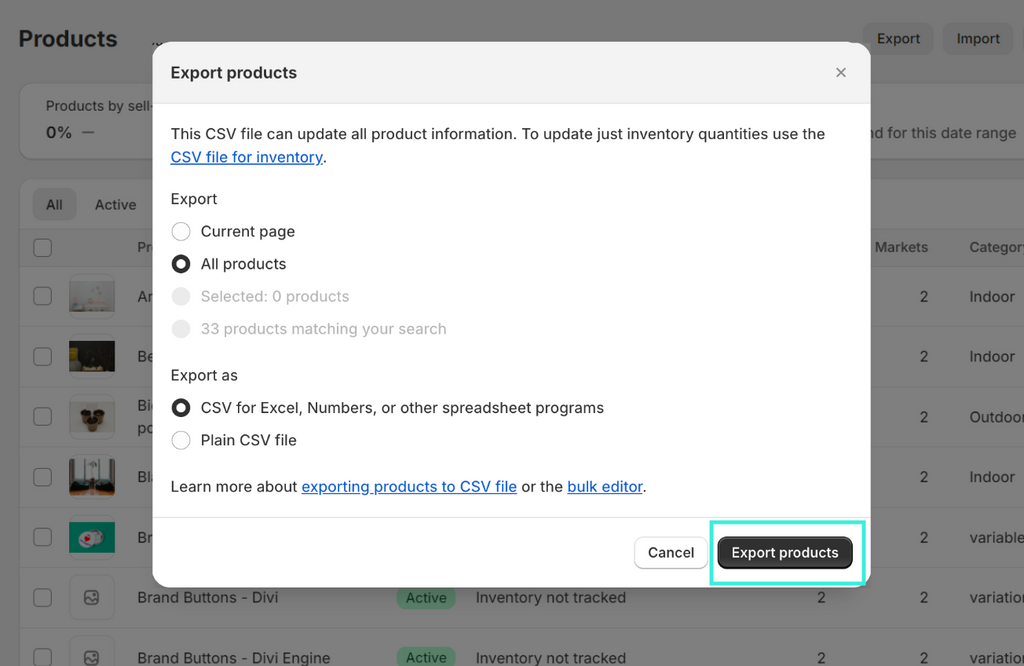
After this, a dialog box will open. Click Export products to download the product details to your local system.
Since we are completely migrating from one Shopify store to another, select All products while exporting them in a CSV format.
Read more: Migrate to Shopify and How to Migrate a Website to Shopify in 2024
Export customer details
To export customers, go to the Shopify admin and click Customers. You will see the details of all your customers on this page.
On the right-hand side, you will have the option Export. Click on it.
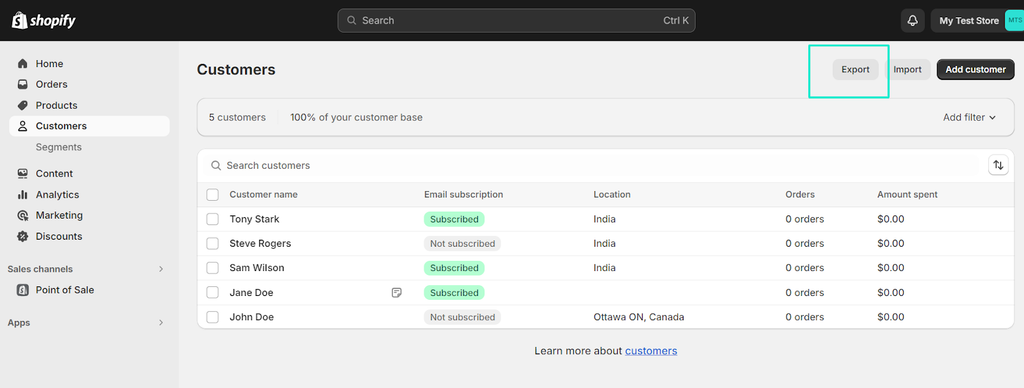
In the pop-up, select “All customers” and click the “Export customers” button to export the list to CSV.

After this process, the customer data will be sent to your registered email ID. Download the data to your local system from your email by clicking the CSV file.
Likewise, you can download other details like images, blog posts, and more from the old Shopify site.
Step 3: Import data into your new Shopify store
Import products
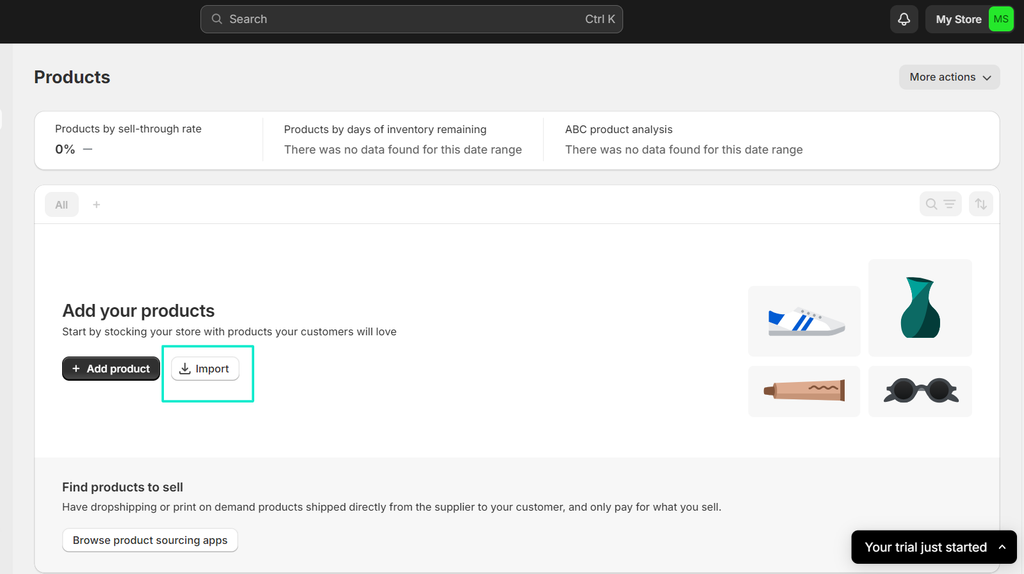
For this, log in to your new store and go to the Shopify admin. Go to Products from the admin panel.
On the Products page, you will see the option Import. Click on it.
A dialog box will open. Click Add file to add the product CSV file you downloaded from your old store.

Once the file is added, click Upload and preview. You will be shown a preview of the first product to confirm that everything is as expected. Click “Import products” to start the process.
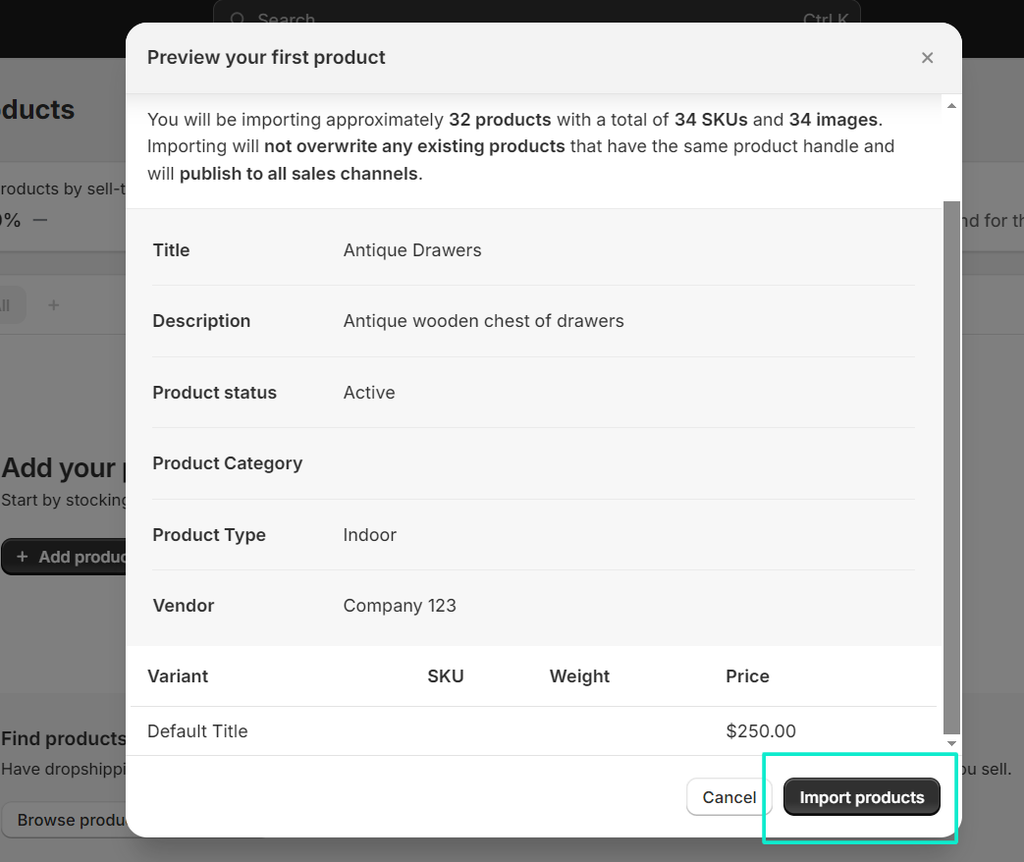
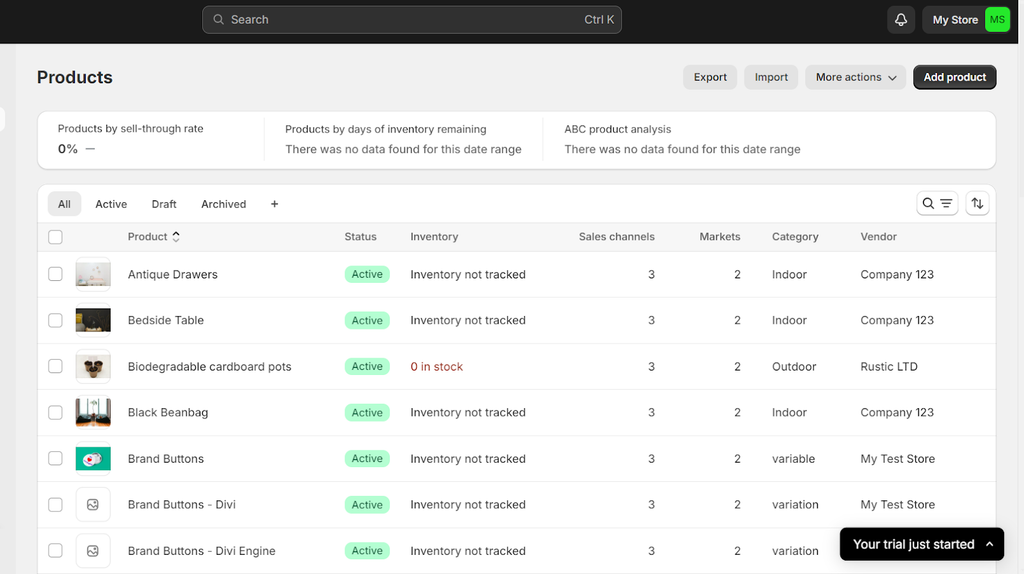
A dialog box will open, stating that the system is importing the products. The new store's product page will be filled with the imported products from your old store.
Import customers
To continue with your Shopify data migration, import customer data by going to your Shopify admin and clicking on Customers.

It will open a new page. You will see two options and between the two select Import customers.
After this, a dialog box will open, click on “Add file” here.
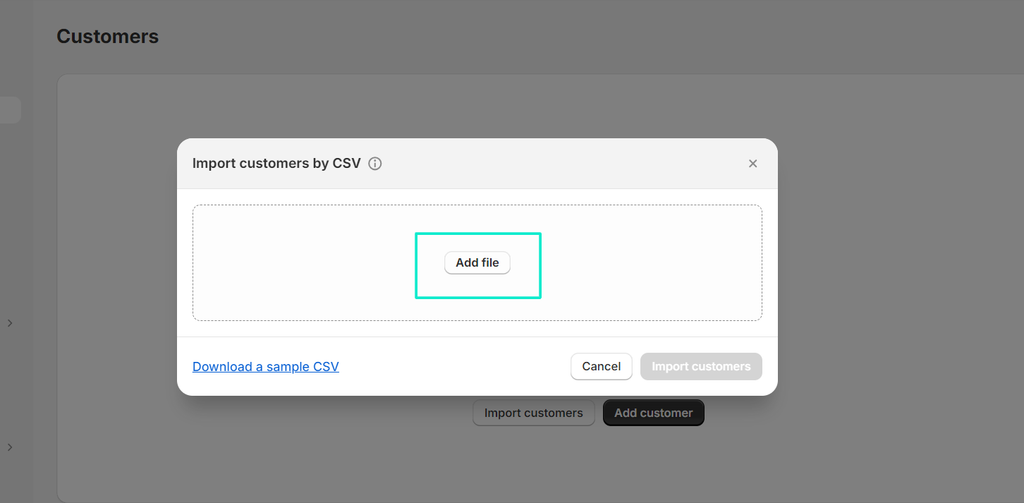
Add the file downloaded from your email. You can check the options as needed. Or you can leave them blank. Click Import customers.
Once the customer data is uploaded, you will be shown how many customers are imported and how many failed.

Click View all customers to see the customers on your new Shopify store.
You can import other types of data, like Orders data, from your old side using the same methods we have shown above.
Step 4: Set up payment gateways
This is the next crucial thing to do in your new Shopify store. Adding a payment gateway is integral to allow your customers to pay for the products safely and securely online.
To add a payment gateway to your store, follow the steps below.
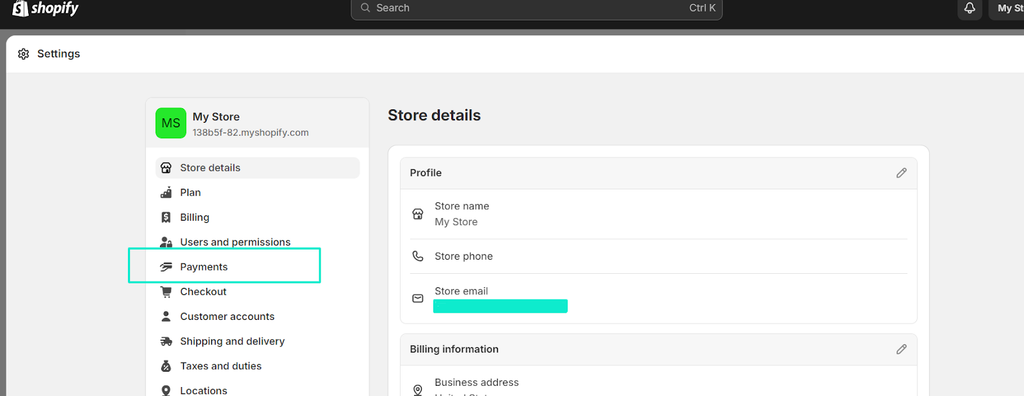
Go to Shopify admin and click Settings.
This will open with various site settings on the left-hand side of the window. Click Payments.
You will see a few payment options on the store by default.
If you need to add a payment method, scroll down the page to the Additional payment methods. Click Add payment method.
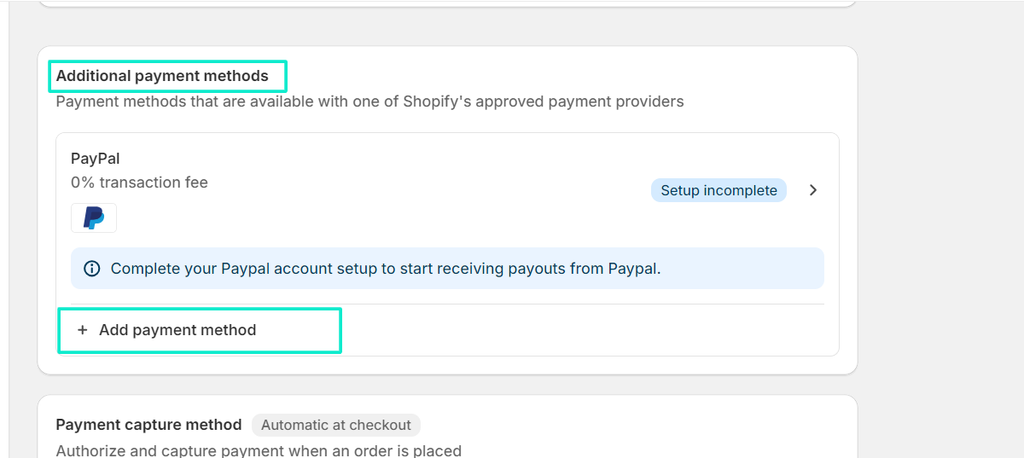
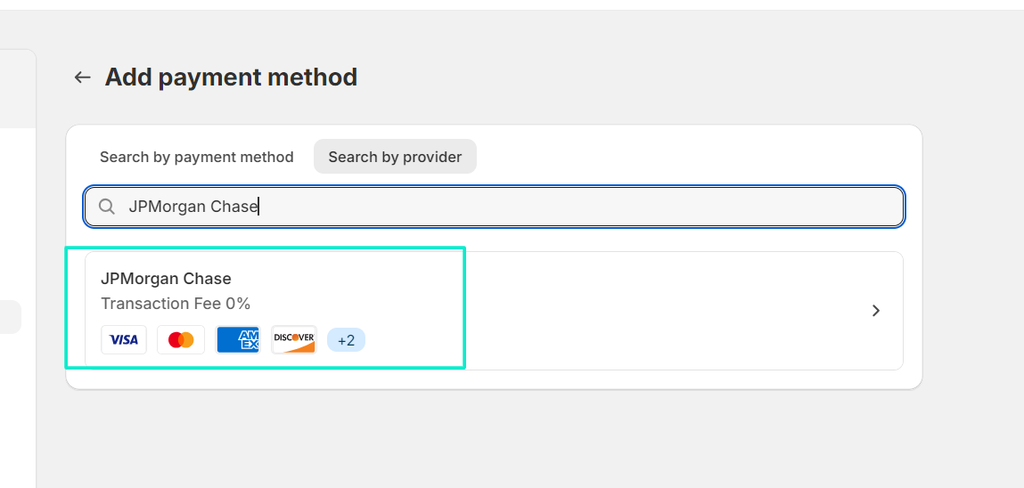
You can add more payment options based on the payment method from the choices given. Alternatively, you can add the options based on the providers given like Shop Pay, Pay Easy, Affirm, Ethereum, and more.
Click the option you prefer, and it will take you to the app page of the corresponding payment method or provider. Select the option given.
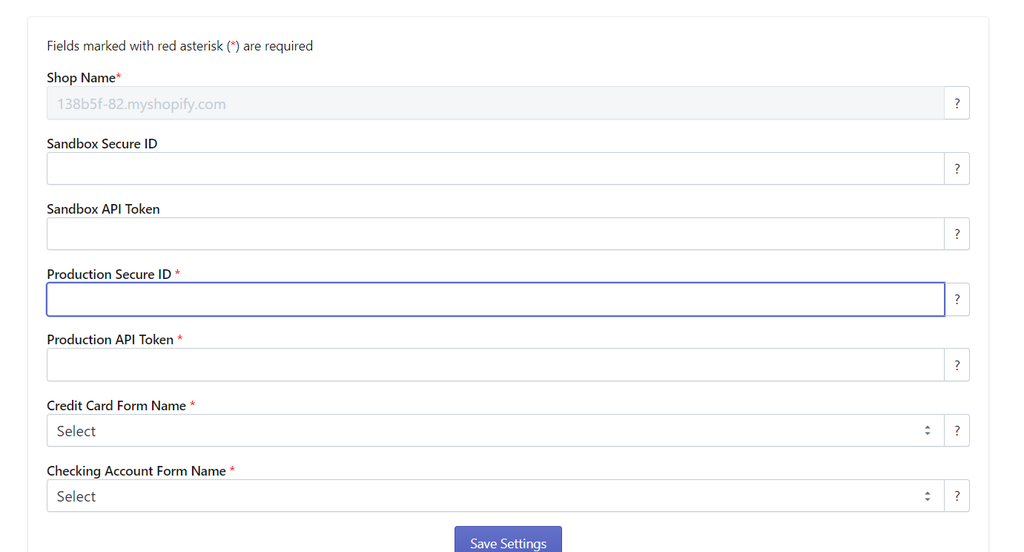
Now, click Install. A dialog box will open. Again click Install to complete the process.
After clicking on Install, it will take you to another page. Give the necessary details as needed based on the provider or method. Save the settings.
Step 5: Update your DNS settings
In this step, you need to update the DNS settings of your new store. For this, update a record for your domain to make it point to your new Shopify store. Or you can transfer the domain to your new Shopify store.
Step 6: Add your shipping and tax information
After successfully adding your domain, it is essential to add your shipping and tax information. If these two are not updated, your customers can face the following issues:
- An error message saying, "Currently no delivery options available at your location."
- High chances of miscalculation of taxes if there is any change in your country-wise operation.
So, make sure to create a proper new shipping zone with proper shipping attributes, including taxes.
Remember: As you redirect your blog pages and other links, make sure to edit your Google Analytics and Google Search Console as per your new Shopify store URL.
Want a team of Shopify experts to do it for you? We recommend Meetanshi, a professional Shopify development company. They have already helped hundreds of businesses make a move to Shopify.
Step 7: Shopify SEO Migration
When transitioning from one Shopify store to another, the key to a seamless migration lies in meticulous planning and execution, focusing on preserving the SEO value you’ve built over time.
- Products and customer data
- URLs
- Meta tags
- Redirects
- etc.
To achieve an effective Shopify SEO migration, start by thoroughly mapping out your existing site’s structure, including all key SEO components.
- Map out your existing site structure: Identify and document all key SEO components, including URLs, meta tags, and internal links.
- Transfer SEO elements to your new store: Set up 301 redirects to ensure old URLs point to the correct new pages, and optimize any new URLs for search engines.
- Test your new store: Confirm that all SEO settings have been correctly applied and that the site is performing well in search engines.
By following these steps, you can ensure that your Shopify SEO migration is smooth and that your new store retains the SEO strength of your previous one.
Mistakes to Avoid When Conducting Shopify Store Migration
Shopify to Shopify migration is a straightforward process. But the chances are high of mistakes when not working with a Shopify migration agency.
Here is a list of common mistakes to keep in mind and avoid when you migrate Shopify to another Shopify store.
Failing to back up your store data
If you do not back up your data, any technical glitches or issues can lead to data loss. This can not only jeopardize your business but also make the customer data vulnerable.
Forgetting the SEO elements
Many businesses also forget or overlook optimizing their store after the migration process. This will lead to losing SERP positions and even traffic loss.
Failing to plan the process
When migrating your Shopify store to another Shopify store, planning everything in advance is key. This offers you ample opportunities to take care of everything.
Overlooking to test the store
After you have moved your old store to a new one, the first thing to do is to test the same. Check everything from contact forms to product reviews, shipment, and payment gateway.
Don’t forget to check the store for mobile performance
Most of your online customers browse your store on a mobile device. Hence, you need to test and check your store on mobile devices as well. This is imperative to ensure mobile user experience.
Failing to set up proper redirects
After you migrate the store, you need to check the redirects to ensure that they work properly. The redirects are integral from both UX and SEO perspectives.
Here are the steps to properly set up redirection:
- From your Shopify dashboard, head to account setting > URL redirects.
- You can also opt for the help option if you are not able to find your URL redirects option.
- Now, enter the old URL in the From section and the new Shopify URL in the To section.
- Now, repeat the process for all the pages you want to redirect.
Keeping the customers unaware
When you migrate a site, your customer's information, like passwords, is not copied to your site. So, invite your customers to set up an account in your migrated Shopify store. You can do this via email, text, WhatsApp, or any other preferred way of communication.
Perform a Seamless Shopify to Shopify Migration
We hope that this guide has provided a detailed explanation of how to migrate Shopify to Shopify, ensuring a seamless transition for your business.
One of the most vital things that you must do is check the entire user flow from start to finish to understand any loopholes your customers can face.
This process is simple and not challenging if all goes well.
However, you may come across various concerns if you do not know what you are doing. Working with an established Shopify migration company is the best way to go if you do not want to mess up the whole thing.
You can consult Shopify experts at Meetanshi to make the move. They have a team of professionals who know this job well and have helped hundreds of businesses migrate to Shopify.
Explore more, check out: Expanding Globally with Multiple Shopify Stores: Essential Insights and Strategies
Migrate Shopify To Shopify FAQ
This depends on the length of your migration process or if you are using a third-party tool for this. This typically takes 2-3 weeks to get this process done entirely.
Since you are going to work on a new site, there might be chances your SEO might get affected. But, if you work and follow a proper SEO migration checklist, you don't need to worry much.
Yes, you will need to pay for each Shopify store you create. After their free trial gets over, you will need to purchase a Shopify plan.